Mailchimp Integration instructions
How to use MailChimp integration in mailcheck.co?

Step by step guide on how to use Mailcheck
How to use MailChimp integration in mailcheck.co? Step-by-step guide on how to use Mailcheck with Mailchimp.
Let me show the easiest way to validate your audience before starting the campaign.
What you need:
- You have to be registered in MailCheck.co
- And be a Mailchimp User
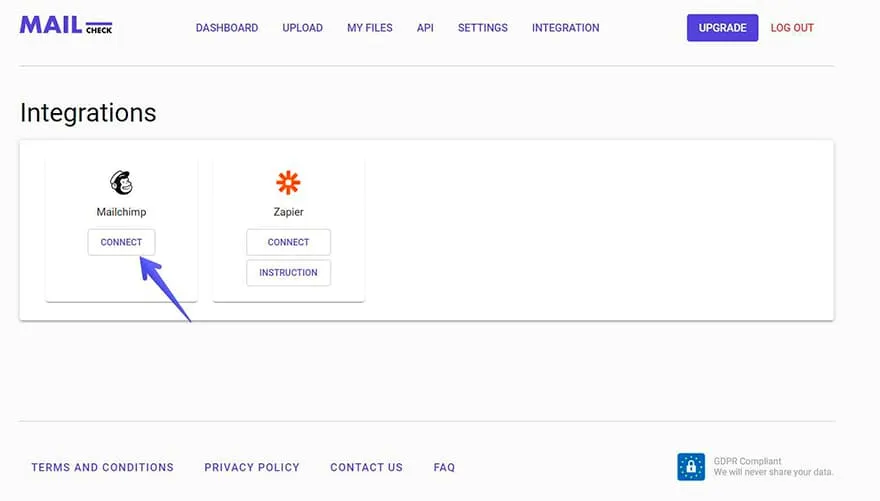
Step 1:
- Go to Integration page
- Click on “Connect” button
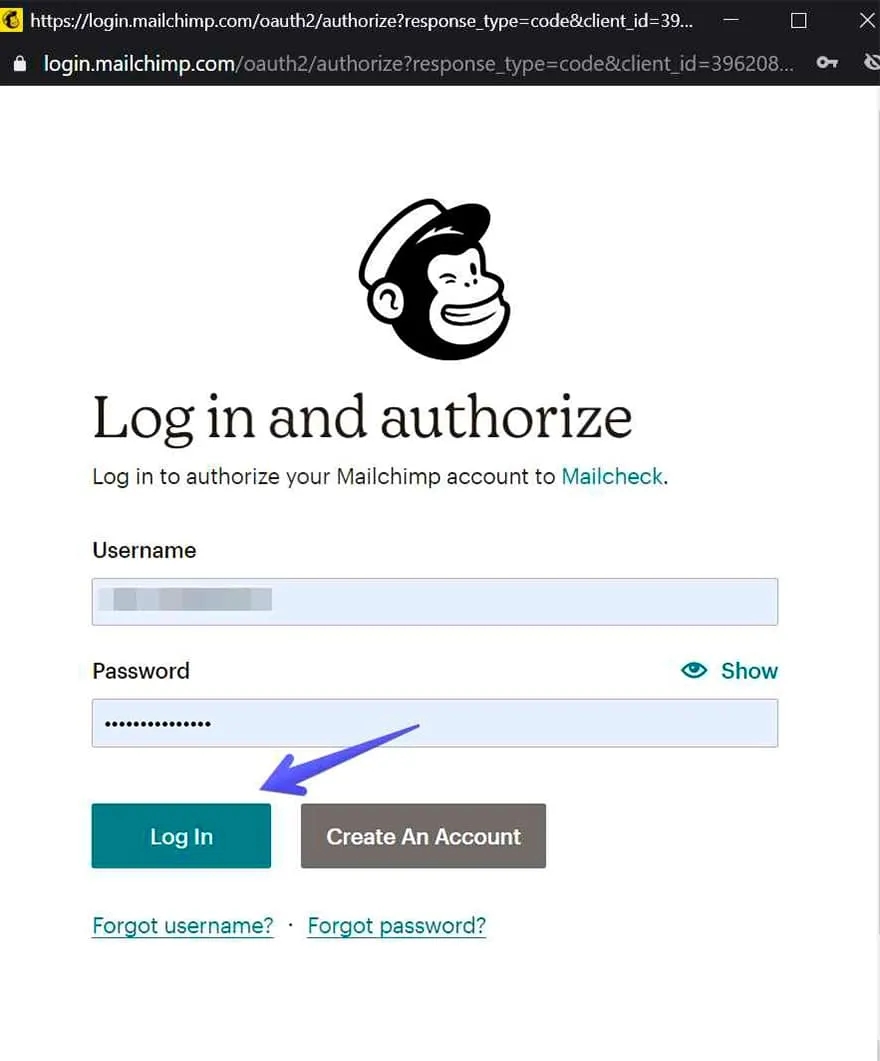
Step 2:
- Log in your Mailchimp account
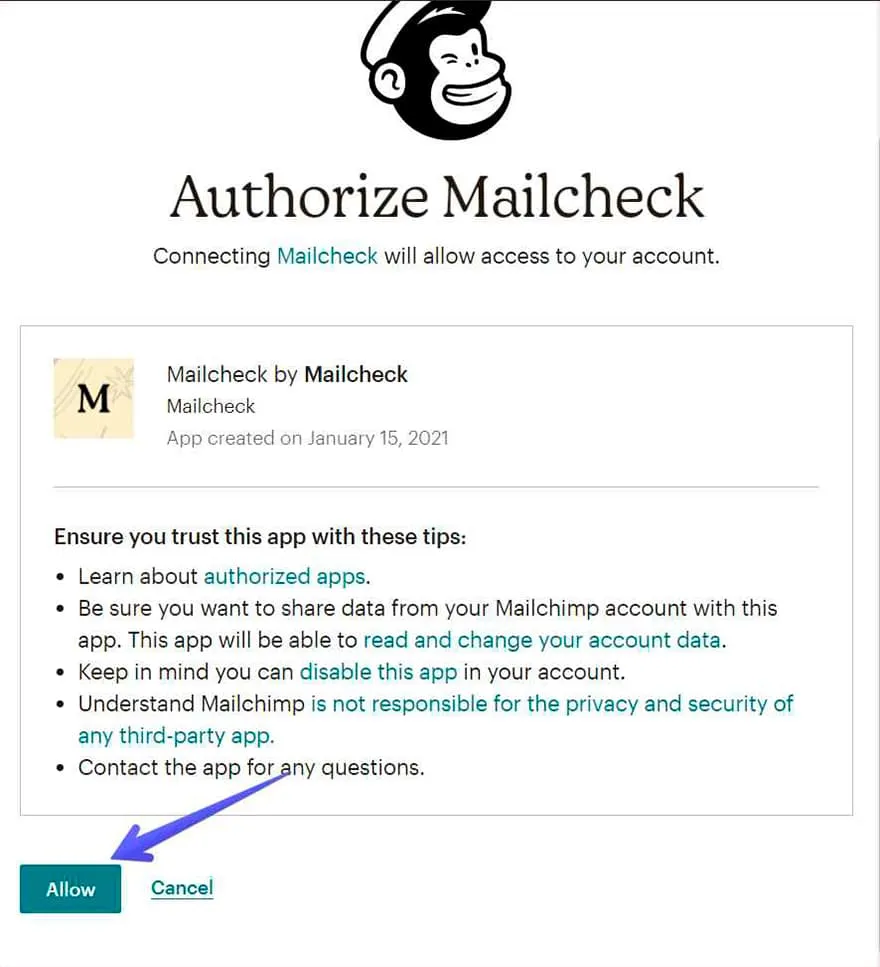
- Allow Mailcheck to view Mailchimp data
Step 3:
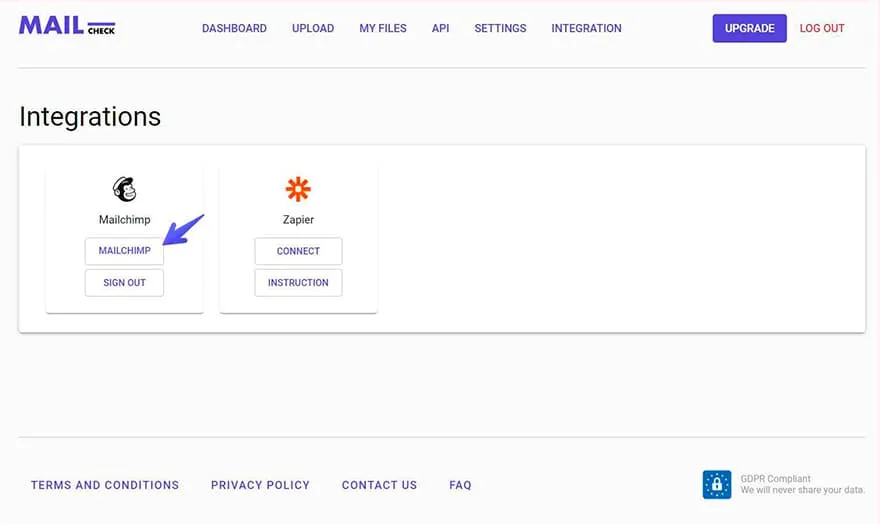
- Once the account connected enter Integration to start the validation process:
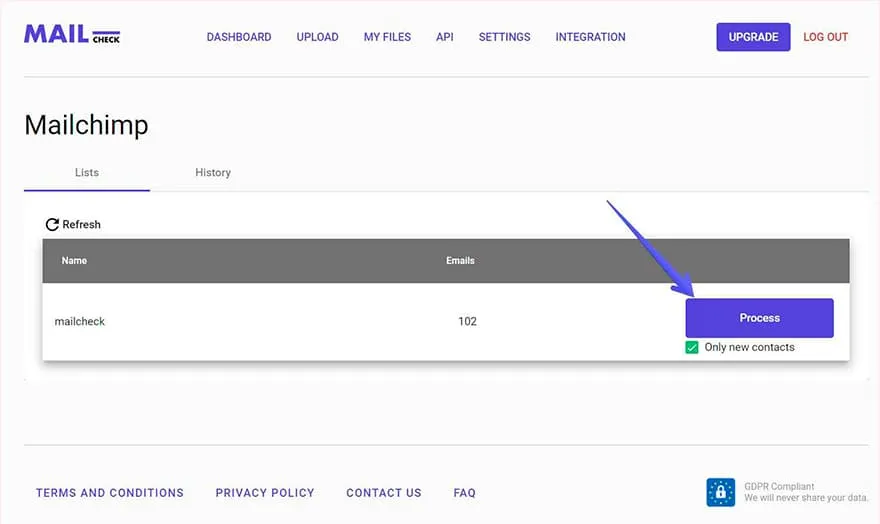
Step 4:
- You can also see the number of emails on the Mailchimp
- Click “Process” to start the validation operation
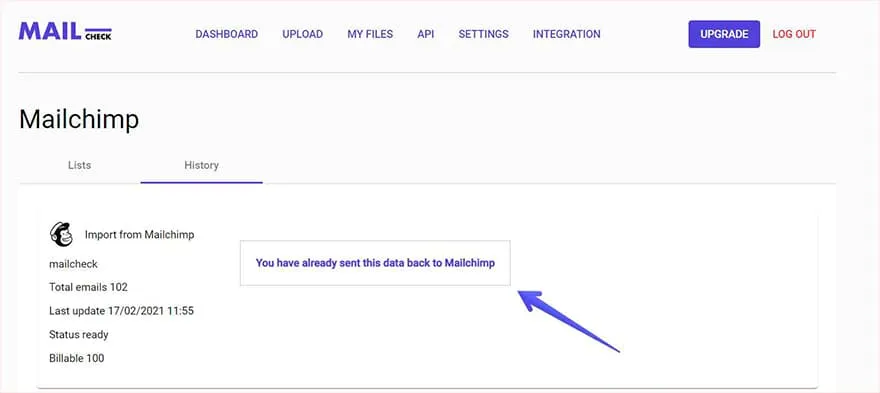
Step 5:
- If the process has started you’ll be prompted to “History” tab where you can see the progress of the validation, once it’s done, the information will be sent to Mailchimp
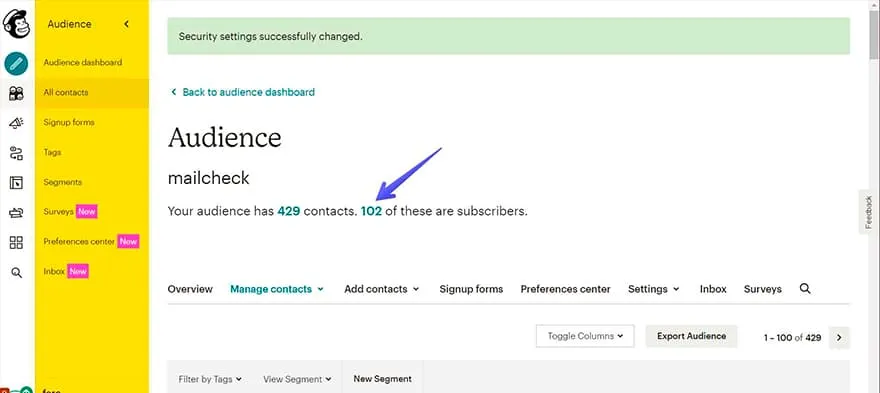
Step 6:
- Let’s go to Mailchimp to see the results:
- Go to audience section
- Choose all contacts
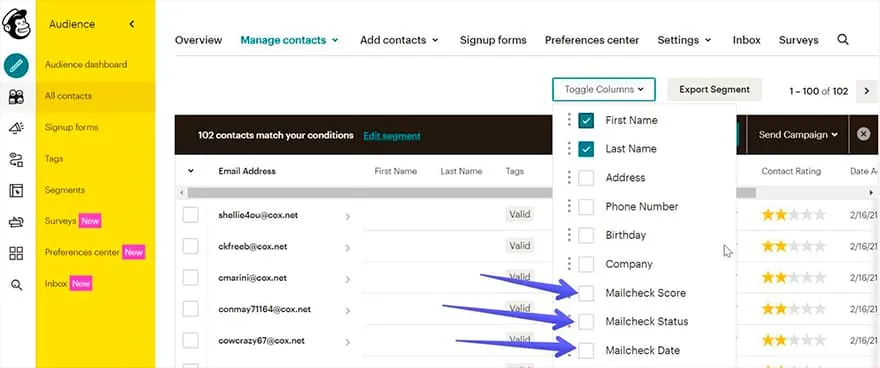
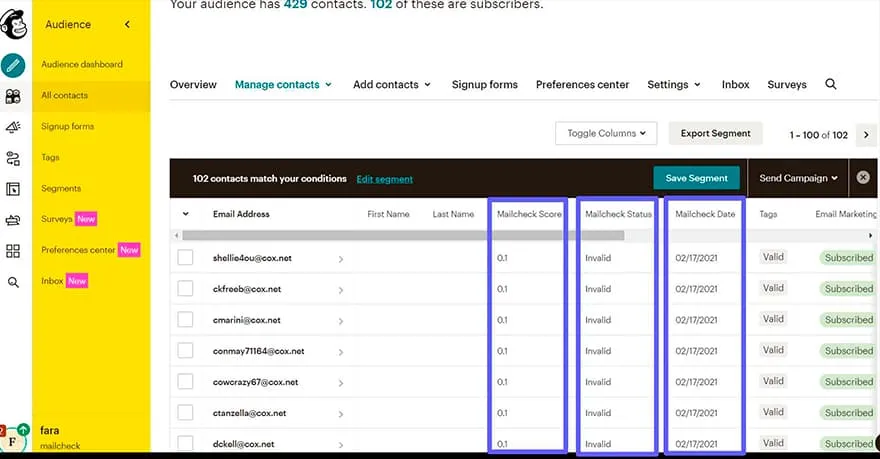
Step 7:
- In order to see Mailcheck results you have to activate the appropriate columns
- Click “Toggle columns” and choose from the dropdown menu “Mailcheck Score”, “Mailcheck Status”, “Mailcheck Date”
Step 8:
- Now you can see the results
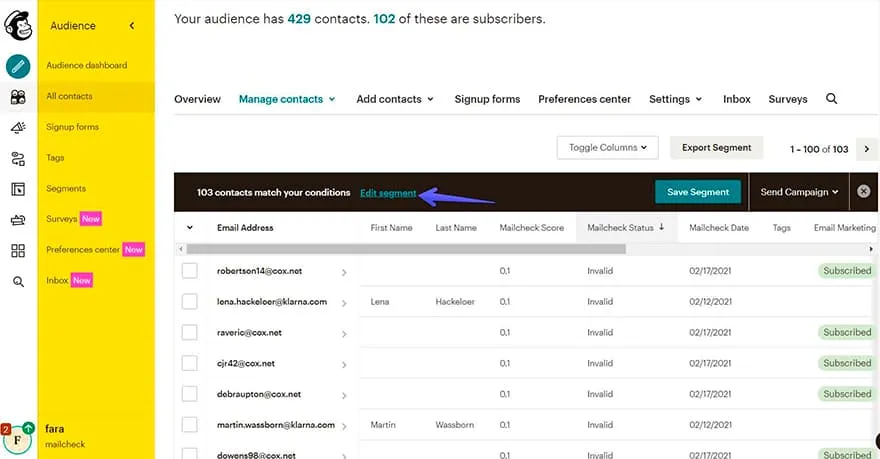
But how to filter the data?
Step 9:
- In order to filter your data in Mailchimp please click on “Edit segment”
- Choose “Mailcheck Status” “is” “invalid” you can actually type any of the existing statuses
- We have 3 options “Valid”, “Invalid”, “Risky but deliverable”
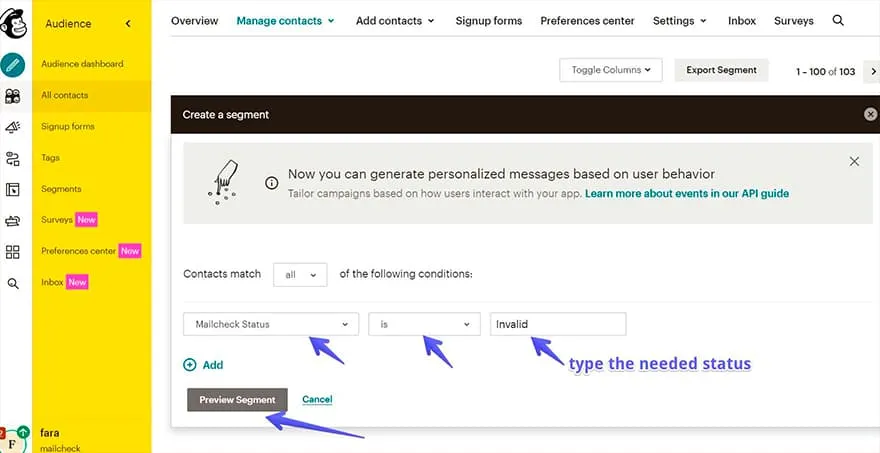
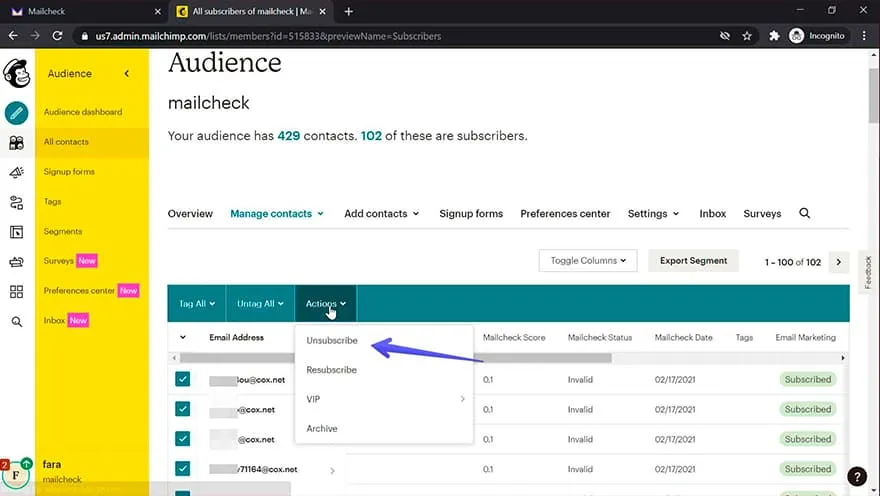
- I’ve decided to choose “invalid” so I could unsubscribe them from emailing list
That’s it 👍 If you still have questions please contact our team via LiveChat or integration@mailcheck.co
Other popular integrations guides: Zapier, Woodpecker, MailerLite, Make.com, SendGrid, Integromat.